Source From Here
Introduction
Docker is a great tool for deploying your servers. While docker.io lets you upload your Docker creations to their registry for free, anything you upload is also public. This probably isn't what you want for a non-open source-project.
This guide will show you how to set up and secure your own private Docker registry. By the end of this tutorial you will be able to push a custom Docker image to your private registry, and pull the image securely from a different host.
This tutorial doesn't cover containerizing your own application, but only how to create the registry where you can store your deployments. If you want to learn how to get started with Docker itself (as opposed to the registry), you may want to read the tutorial here.
This tutorial has been tested with all servers (one registry and one client) running Ubuntu 14.04, but may work with other Debian-based distros.
Docker Concepts
If you haven't used Docker before then it's worth taking a minute to go through a few of Docker's key concepts. If you're already using Docker and just want to know how to get started running your own registry, then please skip ahead to the next section.
For a refresher on how to use Docker, take a look at the excellent Docker Cheat Sheet here.
Docker at it's core is a way to separate an application and the dependencies needed to run it from the operating system itself. To make this possible Docker uses containers and images. A Docker image is basically a template for a filesystem. When you run a Docker image with the docker run command, an instance of this filesystem is made live, and runs on your system inside a Docker container. By default this container can't touch the original image itself, or the filesystem of the host where docker is running. It's a self-contained environment.
Whatever changes you make in the container are preserved in that container itself, and don't affect the original image. If you decide you want to keep those changes, then you can "commit" a container to a Docker image (via the docker commit command). This means you can then spawn new containers that start with the contents of your old container, without affecting the original container (or image). If you're familiar with git then the workflow should seem quite similar: you can create new branches (images in Docker parlance) from any container. Running an image is a bit like doing a git checkout.
To continue the analogy, running a private Docker registry is like running a private Git repository for your Docker images.
Step One — Install Prerequisites
You should create a user with sudo access on the registry server (and on the clients when you get that far).
The Docker registry is a Python application, so to get it up and running we need to install the Python development utilities and a few libraries:
Step Two — Install and Configure Docker Registry
To install the latest stable release of the Docker registry (0.7.3 at the time of writing) we'll use Python's package management utility pip:
Docker-registry requires a configuration file.
pipby default installs this config file in a rather obscure location, which can differ depending how your system's Python is installed. So, to find the path, we'll attempt to run the registry and let it complain:
Since the config file isn't in the right place yet it will fail to start and spit out an error message that contains a FileNotFoundError that looks like this:
The registry includes a sample config file called config_sample.yml at the same path, so we can use the path it gave us to locate the sample file. Copy the path from the error message, and use sample config as config.yml portion:
Docker by default saves its data under the /tmp directory, which can lead to unpleasantness since the /tmp folder is cleared on reboot on many flavors of Linux. Let's create a more permanent folder to store our data:
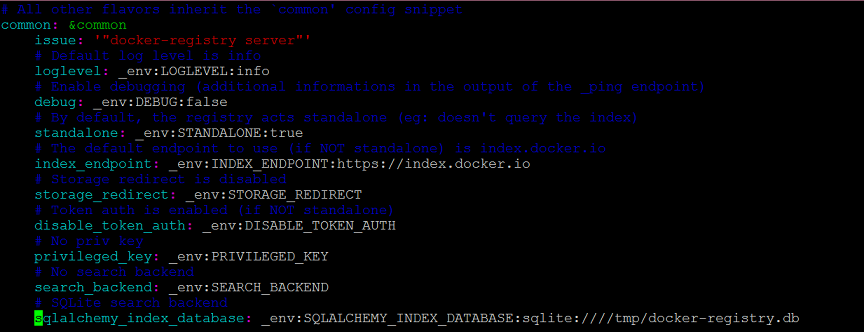
Now we'll edit the config.yml file to update any references to /tmp to /var/docker-registry. First look for a line near the top of the file that starts withsqlalchemy_index_database:
Change it to point to /var/docker-registry like so:
Look a bit further down the file for the local: section, and repeat the process, changing to:
The other default values in the sample config are fine, so no need to change anything there. Feel free to look through them. If you want to do something more complex like using external storage for your Docker data, this file is the place to set it up. That's outside the scope of this tutorial though, so you'll have to check the docker-registry documentation if you want to go that route.
Now that the config is in the right place let's try to test the server again:
Great! Now we have a Docker registry running. Go ahead and kill it with Ctrl+C.
At this point the registry isn't that useful yet — it won't start unless you type in the above gunicorn command. Also, Docker registry doesn't come with any built-in authentication mechanism, so it's insecure and completely open to the public right now.
Step Three - Start Docker Registry as a Service
Let's set the registry to start on system startup by creating an Upstart script.
First let's create a directory for the log files to live in:
Then use your favorite text editor to create an Upstart script:
For more about Upstart scripts, please read this tutorial.
Now it is time to start docker registry service:
Now that the server's running in the background, let's move on to configuring Nginx so the registry is secure.
Step Four — Secure Your Docker Registry with Nginx
The first step is to set up authentication so that not just anybody can log into our server. Let's install Nginx and the apache2-utils package (which allows us to easily create authentication files that Nginx can read).
Now it's time to create our Docker users. Create the first user as follows:
Create a new password for this user when prompted. If you want to add more users in the future, just re-run the above command without the c option:
At this point we have a docker-registry.htpasswd file with our users set up, and a Docker registry available. You can take a peek at the file at any point if you want to view your users (and remove users if you want to revoke access).
Next we need to tell Nginx to use that authentication file, and to forward requests to our Docker registry. Let's create an Nginx configuration file. Create a newdocker-registry file, entering your sudo password if needed:
And link it up so that Nginx can use it:
Then restart Nginx to activate the virtual host configuration:
Let's make sure everything worked. Our Nginx server is listening on port 8080, while our original docker-registry server is listening on localhost port 5000. We can use curl to see if everything is working:
It's worthwhile to run these two test commands from a remote machine as well, using the server's IP address instead of localhost, to verify that your ports are set up correctly. In the Upstart config file we told docker-registry to listen only on localhost, which means it shouldn't be accessible from the outside on port 5000. Nginx, on the other hand, is listening on port 8080 on all interfaces, and should be accessible from the outside. If it isn't then you may need to adjust your firewall permissions.
Good, so authentication is up. Let's try to log in now with one of the usernames you created earlier:
Step Five — Set Up SSL
At this point we have the registry up and running behind Nginx with HTTP basic authentication working. However, the setup is still not very secure since the connections are unencrypted. You might have noticed the commented-out SSL lines in the Nginx config file we made earlier.
Let's enable them. First, open the Nginx configuration file for editing:
Save the file. Nginx is now configured to use SSL and will look for the SSL certificate and key files at /etc/ssl/certs/docker-registry and /etc/ssl/private/docker-registry respectively.
If you already have an SSL certificate set up or are planning to buy one, then you can just copy the certificate and key files to the paths listed above (ssl_certificate and ssl_certificate_key); or you could also get a free signed SSL certificate.
Or, use a self-signed SSL certificate. Since Docker currently doesn't allow you to use self-signed SSL certificates this is a bit more complicated than usual, since we'll also have to set up our system to act as our own certificate signing authority.
Signing Your Own Certificate
First let's make a directory to store the new certificates and go there:
Now we have to make a certificate signing request.
After you type this command OpenSSL will prompt you to answer a few questions. Write whatever you'd like for the first few, but when OpenSSL prompts you to enter the "Common Name" make sure to type in the domain of your server.
Do not enter a challenge password. Then we need to sign the certificate request:
Now that we've generated all the files we need for our certificate to work, we need to copy them to the correct places.
First copy the certificate and key to the paths where Nginx is expecting them to be:
Since the certificates we just generated aren't verified by any known certificate authority (e.g., VeriSign), we need to tell any clients that are going to be using this Docker registry that this is a legitimate certificate. Let's do this locally so that we can use Docker from the Docker registry server itself:
SSL Test
Let's restart Nginx to reload the configuration and SSL keys:
Do another curl test (only this time using https) to verify that our SSL setup is working properly. Keep in mind that for SSL to work correctly you will have to use the same domain name you typed into the Common Name field earlier while you were creating your SSL certificate.
Now we have a Docker registry running behind an Nginx server which is providing authentication and encryption via SSL.
Step Six — Access Your Docker Registry from Another Machine
To access your Docker registry, first add the SSL certificate you created earlier to the new client machine. The file you want is located at ~/certs/devdockerCA.crt. You can copy it to the new machine directly or use the below instructions to copy and paste it. On the registry server, view the certificate:
Copy that output to your clipboard and connect to your client machine. On the client server, create the certificate directory:
If you don't have Docker installed on the client yet, do so now.
On most versions of Ubuntu you can quickly install a recent version of Docker by following the next few commands. If your client is on a different distro or you have issues then see Docker's installation documentation for other ways to install Docker.
Add the repository key:
Create a file to list the Docker repository:
Update your package lists:
Install Docker:
To make working with Docker a little easier, let's add our current user to the Docker group and re-open a new shell:
Restart Docker to make sure it reloads the system's CA certificates.
You should now be able to log in to your Docker registry from the client machine:
Note that you're using https:// and port 8080 here. Enter the username and password you set up earlier (enter whatever you'd like for email if prompted). You should see a Login Succeeded message. At this point your Docker registry is up and running! Let's make a test image to push to the registry.
Step Seven — Publish to Your Docker Registry
On the client server, create a small empty image to push to our new registry.
After it finishes downloading you'll be inside a Docker prompt. Let's make a quick change to the filesystem:
Commit the change:
If you run docker images now, you'll see that you have a new test-image in the image list:
This image only exists locally right now, so let's push it to the new registry we've created. First, log in to the registry with Docker. Note that you want to usehttps:// and port 8080:
Docker has an unusual mechanism for specifying which registry to push to. You have to tag an image with the private registry's location in order to push to it. Let's tag our image to our private registry:
Note that you are using the local name of the image first, then the tag you want to add to it. The tag is not using https://, just the domain, port, and image name. Now we can push that image to our registry. This time we're using the tag name only:
This will take a moment to upload to the registry server. You should see output that includes Image successfully pushed.
Step Eight - Pull from Your Docker Registry
To make sure everything worked let's go back to our original server (where you installed the Docker registry) and pull the image we just pushed from the client. You could also test this from a third server.
If Docker is not installed on your test pull server, go back and follow the installation instructions (and if it's a third server, the SSL instructions) from Step Six. Log in with the username and password you set up previously.
And now pull the image. You want just the "tag" image name, which includes the domain name, port, and image name (but not https://):
Docker will do some downloading and return you to the prompt. If you run the image on the new machine you'll see that the SUCCESS file we created earlier is there:
Congratulations! You've just used your own private Docker registry to push and pull your first Docker container! Happy Docker-ing!
Supplement
* Docker Practice - Repository
* How do I set my DNS on Ubuntu 14.04?
* access private registry: x509: certificate signed by unknown authority
Introduction
Docker is a great tool for deploying your servers. While docker.io lets you upload your Docker creations to their registry for free, anything you upload is also public. This probably isn't what you want for a non-open source-project.
This guide will show you how to set up and secure your own private Docker registry. By the end of this tutorial you will be able to push a custom Docker image to your private registry, and pull the image securely from a different host.
This tutorial doesn't cover containerizing your own application, but only how to create the registry where you can store your deployments. If you want to learn how to get started with Docker itself (as opposed to the registry), you may want to read the tutorial here.
This tutorial has been tested with all servers (one registry and one client) running Ubuntu 14.04, but may work with other Debian-based distros.
Docker Concepts
If you haven't used Docker before then it's worth taking a minute to go through a few of Docker's key concepts. If you're already using Docker and just want to know how to get started running your own registry, then please skip ahead to the next section.
For a refresher on how to use Docker, take a look at the excellent Docker Cheat Sheet here.
Docker at it's core is a way to separate an application and the dependencies needed to run it from the operating system itself. To make this possible Docker uses containers and images. A Docker image is basically a template for a filesystem. When you run a Docker image with the docker run command, an instance of this filesystem is made live, and runs on your system inside a Docker container. By default this container can't touch the original image itself, or the filesystem of the host where docker is running. It's a self-contained environment.
Whatever changes you make in the container are preserved in that container itself, and don't affect the original image. If you decide you want to keep those changes, then you can "commit" a container to a Docker image (via the docker commit command). This means you can then spawn new containers that start with the contents of your old container, without affecting the original container (or image). If you're familiar with git then the workflow should seem quite similar: you can create new branches (images in Docker parlance) from any container. Running an image is a bit like doing a git checkout.
To continue the analogy, running a private Docker registry is like running a private Git repository for your Docker images.
Step One — Install Prerequisites
You should create a user with sudo access on the registry server (and on the clients when you get that far).
The Docker registry is a Python application, so to get it up and running we need to install the Python development utilities and a few libraries:
Step Two — Install and Configure Docker Registry
To install the latest stable release of the Docker registry (0.7.3 at the time of writing) we'll use Python's package management utility pip:
Docker-registry requires a configuration file.
pipby default installs this config file in a rather obscure location, which can differ depending how your system's Python is installed. So, to find the path, we'll attempt to run the registry and let it complain:
Since the config file isn't in the right place yet it will fail to start and spit out an error message that contains a FileNotFoundError that looks like this:
The registry includes a sample config file called config_sample.yml at the same path, so we can use the path it gave us to locate the sample file. Copy the path from the error message, and use sample config as config.yml portion:
Docker by default saves its data under the /tmp directory, which can lead to unpleasantness since the /tmp folder is cleared on reboot on many flavors of Linux. Let's create a more permanent folder to store our data:
Now we'll edit the config.yml file to update any references to /tmp to /var/docker-registry. First look for a line near the top of the file that starts withsqlalchemy_index_database:
Change it to point to /var/docker-registry like so:
- # SQLite search backend
- sqlalchemy_index_database: _env:SQLALCHEMY_INDEX_DATABASE:sqlite:////var/docker-registry/docker-registry.db
- local: &local
- <<: common="" nbsp="" span="">
- storage: local
- storage_path: _env:STORAGE_PATH:/var/docker-registry/registry
Now that the config is in the right place let's try to test the server again:
Great! Now we have a Docker registry running. Go ahead and kill it with Ctrl+C.
At this point the registry isn't that useful yet — it won't start unless you type in the above gunicorn command. Also, Docker registry doesn't come with any built-in authentication mechanism, so it's insecure and completely open to the public right now.
Step Three - Start Docker Registry as a Service
Let's set the registry to start on system startup by creating an Upstart script.
First let's create a directory for the log files to live in:
Then use your favorite text editor to create an Upstart script:
For more about Upstart scripts, please read this tutorial.
Now it is time to start docker registry service:
Now that the server's running in the background, let's move on to configuring Nginx so the registry is secure.
Step Four — Secure Your Docker Registry with Nginx
The first step is to set up authentication so that not just anybody can log into our server. Let's install Nginx and the apache2-utils package (which allows us to easily create authentication files that Nginx can read).
Now it's time to create our Docker users. Create the first user as follows:
Create a new password for this user when prompted. If you want to add more users in the future, just re-run the above command without the c option:
At this point we have a docker-registry.htpasswd file with our users set up, and a Docker registry available. You can take a peek at the file at any point if you want to view your users (and remove users if you want to revoke access).
Next we need to tell Nginx to use that authentication file, and to forward requests to our Docker registry. Let's create an Nginx configuration file. Create a newdocker-registry file, entering your sudo password if needed:
And link it up so that Nginx can use it:
Then restart Nginx to activate the virtual host configuration:
Let's make sure everything worked. Our Nginx server is listening on port 8080, while our original docker-registry server is listening on localhost port 5000. We can use curl to see if everything is working:
It's worthwhile to run these two test commands from a remote machine as well, using the server's IP address instead of localhost, to verify that your ports are set up correctly. In the Upstart config file we told docker-registry to listen only on localhost, which means it shouldn't be accessible from the outside on port 5000. Nginx, on the other hand, is listening on port 8080 on all interfaces, and should be accessible from the outside. If it isn't then you may need to adjust your firewall permissions.
Good, so authentication is up. Let's try to log in now with one of the usernames you created earlier:
Step Five — Set Up SSL
At this point we have the registry up and running behind Nginx with HTTP basic authentication working. However, the setup is still not very secure since the connections are unencrypted. You might have noticed the commented-out SSL lines in the Nginx config file we made earlier.
Let's enable them. First, open the Nginx configuration file for editing:
Save the file. Nginx is now configured to use SSL and will look for the SSL certificate and key files at /etc/ssl/certs/docker-registry and /etc/ssl/private/docker-registry respectively.
If you already have an SSL certificate set up or are planning to buy one, then you can just copy the certificate and key files to the paths listed above (ssl_certificate and ssl_certificate_key); or you could also get a free signed SSL certificate.
Or, use a self-signed SSL certificate. Since Docker currently doesn't allow you to use self-signed SSL certificates this is a bit more complicated than usual, since we'll also have to set up our system to act as our own certificate signing authority.
Signing Your Own Certificate
First let's make a directory to store the new certificates and go there:
Now we have to make a certificate signing request.
After you type this command OpenSSL will prompt you to answer a few questions. Write whatever you'd like for the first few, but when OpenSSL prompts you to enter the "Common Name" make sure to type in the domain of your server.
Do not enter a challenge password. Then we need to sign the certificate request:
Now that we've generated all the files we need for our certificate to work, we need to copy them to the correct places.
First copy the certificate and key to the paths where Nginx is expecting them to be:
Since the certificates we just generated aren't verified by any known certificate authority (e.g., VeriSign), we need to tell any clients that are going to be using this Docker registry that this is a legitimate certificate. Let's do this locally so that we can use Docker from the Docker registry server itself:
SSL Test
Let's restart Nginx to reload the configuration and SSL keys:
Do another curl test (only this time using https) to verify that our SSL setup is working properly. Keep in mind that for SSL to work correctly you will have to use the same domain name you typed into the Common Name field earlier while you were creating your SSL certificate.
Now we have a Docker registry running behind an Nginx server which is providing authentication and encryption via SSL.
Step Six — Access Your Docker Registry from Another Machine
To access your Docker registry, first add the SSL certificate you created earlier to the new client machine. The file you want is located at ~/certs/devdockerCA.crt. You can copy it to the new machine directly or use the below instructions to copy and paste it. On the registry server, view the certificate:
Copy that output to your clipboard and connect to your client machine. On the client server, create the certificate directory:
If you don't have Docker installed on the client yet, do so now.
On most versions of Ubuntu you can quickly install a recent version of Docker by following the next few commands. If your client is on a different distro or you have issues then see Docker's installation documentation for other ways to install Docker.
Add the repository key:
Create a file to list the Docker repository:
Update your package lists:
Install Docker:
To make working with Docker a little easier, let's add our current user to the Docker group and re-open a new shell:
Restart Docker to make sure it reloads the system's CA certificates.
You should now be able to log in to your Docker registry from the client machine:
Note that you're using https:// and port 8080 here. Enter the username and password you set up earlier (enter whatever you'd like for email if prompted). You should see a Login Succeeded message. At this point your Docker registry is up and running! Let's make a test image to push to the registry.
Step Seven — Publish to Your Docker Registry
On the client server, create a small empty image to push to our new registry.
After it finishes downloading you'll be inside a Docker prompt. Let's make a quick change to the filesystem:
Commit the change:
If you run docker images now, you'll see that you have a new test-image in the image list:
This image only exists locally right now, so let's push it to the new registry we've created. First, log in to the registry with Docker. Note that you want to usehttps:// and port 8080:
Docker has an unusual mechanism for specifying which registry to push to. You have to tag an image with the private registry's location in order to push to it. Let's tag our image to our private registry:
Note that you are using the local name of the image first, then the tag you want to add to it. The tag is not using https://, just the domain, port, and image name. Now we can push that image to our registry. This time we're using the tag name only:
This will take a moment to upload to the registry server. You should see output that includes Image successfully pushed.
Step Eight - Pull from Your Docker Registry
To make sure everything worked let's go back to our original server (where you installed the Docker registry) and pull the image we just pushed from the client. You could also test this from a third server.
If Docker is not installed on your test pull server, go back and follow the installation instructions (and if it's a third server, the SSL instructions) from Step Six. Log in with the username and password you set up previously.
And now pull the image. You want just the "tag" image name, which includes the domain name, port, and image name (but not https://):
Docker will do some downloading and return you to the prompt. If you run the image on the new machine you'll see that the SUCCESS file we created earlier is there:
Congratulations! You've just used your own private Docker registry to push and pull your first Docker container! Happy Docker-ing!
Supplement
* Docker Practice - Repository
* How do I set my DNS on Ubuntu 14.04?
* access private registry: x509: certificate signed by unknown authority


沒有留言:
張貼留言