前言 :
這裡要介紹如何透過 Eclipse 的 plugin EGit 來從 Github import 專案到本地端.
Create Repository in Github :
在一開始你必須先在 Github 建立一個 Repository. 有關建立的過程說明可以參考 Create Repository at GitHub. 這裡假設你已經完成建立一個 Repository 且其 HTTP 的路徑為https://johnklee@github.com/johnklee/CRFPrac.git
安裝 EGit :
你可以直接使用 Eclipse (這裡使用的 Eclipse 版本 Version: 3.7.2) 的選單 : Help > Install New Software
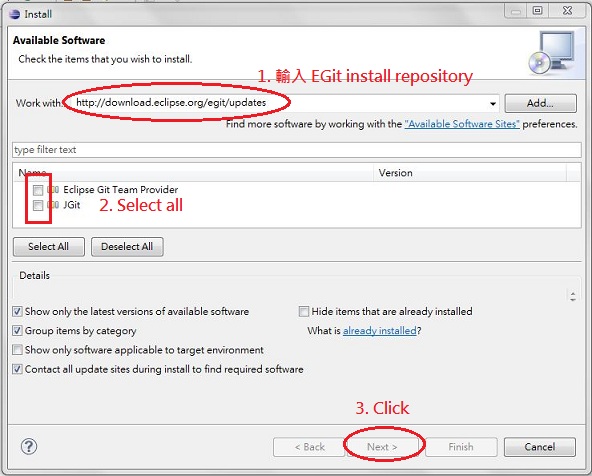
(在出現視窗的 Work with 輸入 EGit install repository URL path. 可以參考這裡)
接著按照指示一步步便可完成安裝 EGit plugin 到 Eclipse. 而在使用 EGit 之前還需要一些簡單的設定, 可以參考這裡.
Import from Github :
接著我們要從 Github 上 import 專案 CRFPrac 到本地端. 詳細步驟請參考下面說明 :
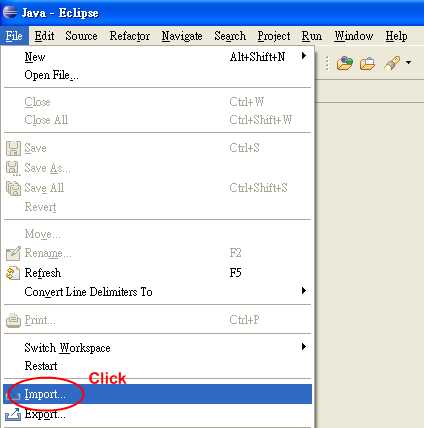
Step1 : 請執行 Eclipse 選單 File > Import
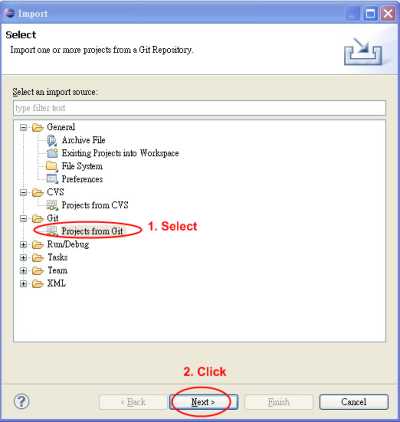
Step2 : 再出現視窗選擇 Git > Projects from Git
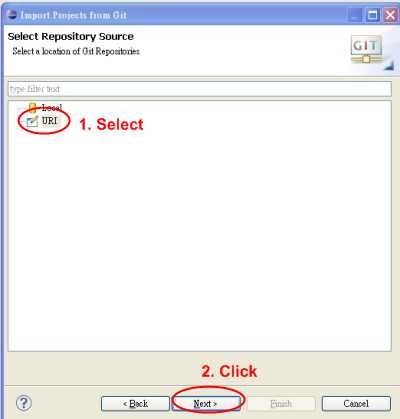
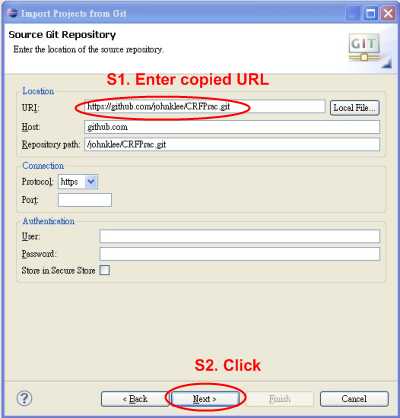
Step3 : 在出現視窗選擇 URI 並點擊 "Next"
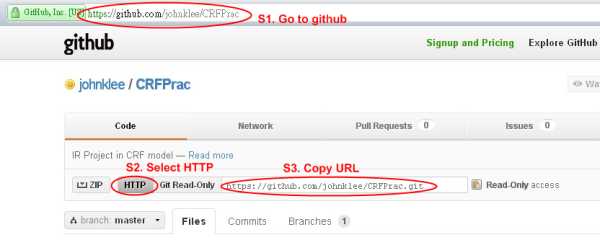
Step4 : 接著請到 Github 專案 CRFPrac, 選擇使用 HTTP 並複製其專案對應的 URL : https://johnklee@github.com/johnklee/CRFPrac.git
Step5 : 在 Step3 後出現的視窗填入 Step4 的 URL 後點擊 "Next"
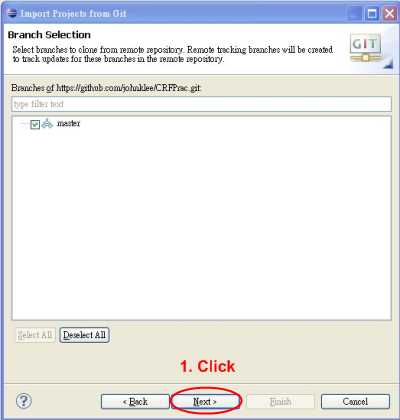
Step6 : 在出現視窗點擊 "Next" (預設是 master 的 branch)
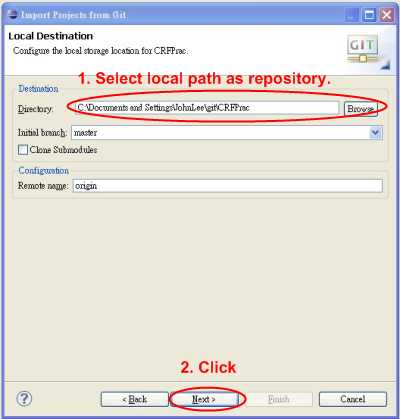
Step7 : 選擇 Local repository 的路徑後, 點擊 "Next"
Step8 : 選擇 "Import from existing project" 並點擊 "Next"
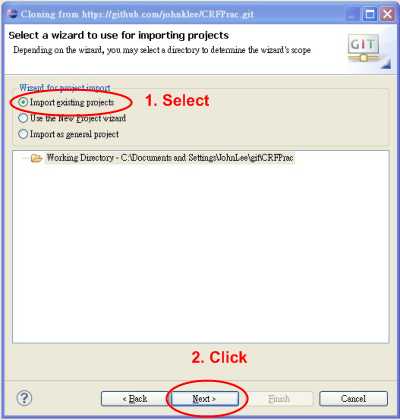
(這邊的 CRFPrac 專案有把 .project 等系統檔上傳到 Github, 所以可以使用選項 "Import from existing project"!)
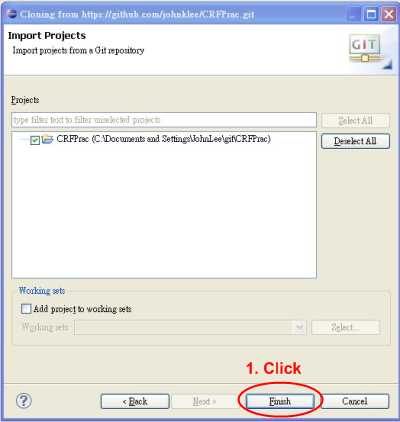
Step9 : 在上一步後出現下面視窗, 點擊 "Finish" 完成專案 CRFPrac import!
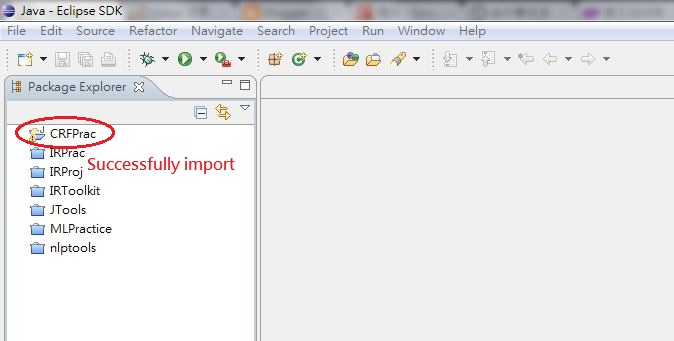
Step10 : 最後你應該發現專案成功 import 到 Eclipse 的 Package Explorer
Supplement :
* EGit Document - User Guide
* [Git Pro] Ch1 : Getting Started
* [Git Pro] Ch2 : Git Basics - Part 1
* [Git Pro] Ch2 : Git Basics - Part 2
這裡要介紹如何透過 Eclipse 的 plugin EGit 來從 Github import 專案到本地端.
Create Repository in Github :
在一開始你必須先在 Github 建立一個 Repository. 有關建立的過程說明可以參考 Create Repository at GitHub. 這裡假設你已經完成建立一個 Repository 且其 HTTP 的路徑為https://johnklee@github.com/johnklee/CRFPrac.git
安裝 EGit :
你可以直接使用 Eclipse (這裡使用的 Eclipse 版本 Version: 3.7.2) 的選單 : Help > Install New Software
(在出現視窗的 Work with 輸入 EGit install repository URL path. 可以參考這裡)
接著按照指示一步步便可完成安裝 EGit plugin 到 Eclipse. 而在使用 EGit 之前還需要一些簡單的設定, 可以參考這裡.
Import from Github :
接著我們要從 Github 上 import 專案 CRFPrac 到本地端. 詳細步驟請參考下面說明 :
Step1 : 請執行 Eclipse 選單 File > Import
Step2 : 再出現視窗選擇 Git > Projects from Git
Step3 : 在出現視窗選擇 URI 並點擊 "Next"
Step4 : 接著請到 Github 專案 CRFPrac, 選擇使用 HTTP 並複製其專案對應的 URL : https://johnklee@github.com/johnklee/CRFPrac.git
Step5 : 在 Step3 後出現的視窗填入 Step4 的 URL 後點擊 "Next"
Step6 : 在出現視窗點擊 "Next" (預設是 master 的 branch)
Step7 : 選擇 Local repository 的路徑後, 點擊 "Next"
Step8 : 選擇 "Import from existing project" 並點擊 "Next"
(這邊的 CRFPrac 專案有把 .project 等系統檔上傳到 Github, 所以可以使用選項 "Import from existing project"!)
Step9 : 在上一步後出現下面視窗, 點擊 "Finish" 完成專案 CRFPrac import!
Step10 : 最後你應該發現專案成功 import 到 Eclipse 的 Package Explorer
Supplement :
* EGit Document - User Guide
* [Git Pro] Ch1 : Getting Started
* [Git Pro] Ch2 : Git Basics - Part 1
* [Git Pro] Ch2 : Git Basics - Part 2


沒有留言:
張貼留言