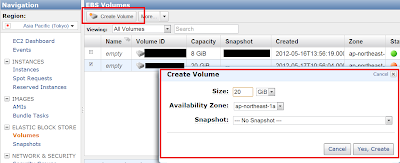
Step1 - 建立EBS Volume
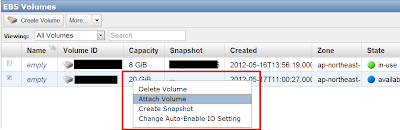
Step2 - 選擇Attach Volume
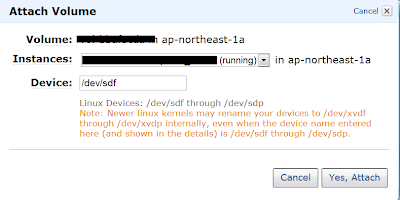
Step3- 選擇要掛載到哪個Instances
NOTE: 即使你在這邊輸入的是 /dev/sdf,有些新的Linux核心會將以不同名子來呈現;
以我的為例,我雖然輸入 /dev/sdf 但我系統 (Ubuntu 11.1) 裡面呈現為: /dev/xvdf
Step4 - 確認xvdf存在與否(可能會因不同kernel而異)
Step 5- 使用 fdisk 來建 partition table(全部分配)
Step 6 -格式化
Step 7 - 掛載到 /data
最後check
Supplement
* AWS Essentials - EC2
* 替 Linux 新增硬碟(磁碟分割、格式化與掛載)


沒有留言:
張貼留言